Showing posts with label built-in. Show all posts

Tuesday, June 3, 2014

A (very) quick attic update...

We've been busy with birthdays, spring cleaning, & general summer fun in the past couple weeks as the weather has been beautiful.  FINALLY!

In between all of that, I've squeezed in a little bit of work on the attic.  Thought I'd share a few quick snaps of the progress!

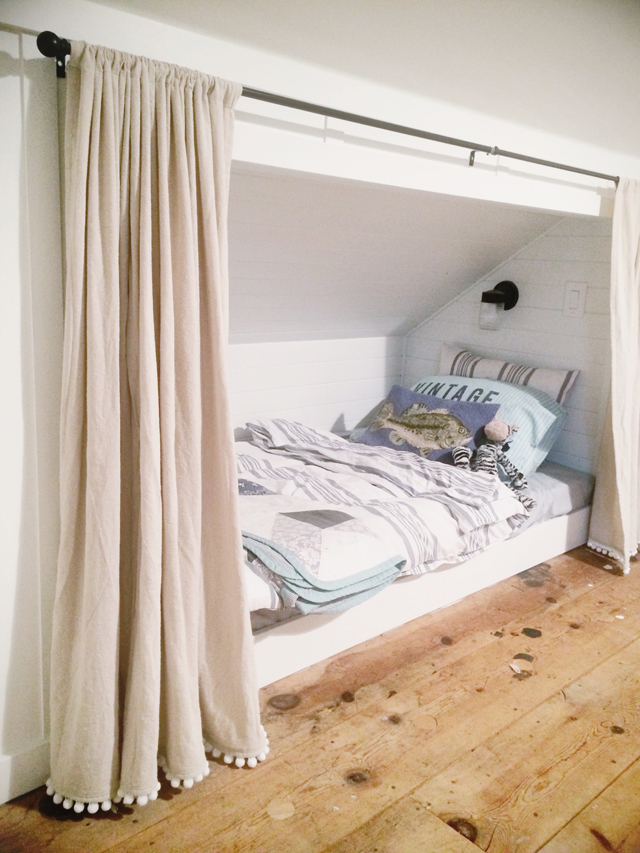
I added some white pom trim to the bunk curtains.  Love it.  Can't ever go wrong with pom poms.  (Well...pom pom trim anyway.)

Dad working hard hanging up the stair rails.  $20 on Craig's List...a lot of elbow grease...& the satisfaction of reusing something that would have ended up in a landfill.  (The railings are spray-primed in the picture below.  Mom & I spent the better part of the weekend brushing them by hand.  Not a fun task.)


Almost done painting in this picture.  Black posts & horizontal rails, white spindles.


Finished stair rails & old wood floor.


And last but not least...the icing on the cake...I started painting the floor late last night!  I'm in LOVE.  My office will soon be set up in that little nook.  Can. Hardly. Wait.


That's it for now!  I'll try to post some non-iphone shots later this week, but we've got a big 5th birthday party at our house this weekend that I'm busy prepping for, so I can't make any promises!

Thanks for hanging in there for this massive attic project.  It's taken us waaaaaaay longer than I ever expected...but I also love the space way more than I anticipated...so I suppose it's all worth it in the end!

Still on the list:
  • Finish painting the floor
  • Finish closets
  • Under eave storage doors
  • Knock out stairwell doorway & repair
  • Random odds & ends
Eeek!


Tuesday, September 17, 2013

Attic Update #5: Bunk Nook = complete!

I(we) checked another item off the attic list this weekend!

The inside of the bunk nook is finished.  My arms are still burning & neck is still sore from caulking & painting all weekend, but it's so cute & cozy, & it was so worth it!

Friday night & Saturday were spent nailing up all of the pine planking.  It was a little tedious, but dad & I had a good system going with me cutting & him measuring & nailing the planks up.


On Sunday morning I dug out my trusty tube of fast-drying, paintable caulk & got to work filling in all of the nail holes, gaps, & knotholes.

I finally picked all of the caulk out from under my fingernails today.


Then, my trusty helper worked ahead of me painting all of the seams.  He lasted about 15 minutes, but that's ok...he's 4.  He told me that grandpa is a builder, because he builds all of the time, & me, grandma, & him are the painters...but someday he wants to be a builder like grandpa.  :)


On the left is pre-paint & on the right after one coat of primer/paint in one.


After two coats of paint & looking fine!  (That gap in the top right bothers me...I'll have to get the caulk out again to fill that in.)  The header in the top right will be trimmed out after we finish the sheetrock in the rest of the attic.  I think that crisp white paneling is probably one of my most favorite things...in the entire world.


He's 4 going on 18, I swear.  He grabbed the switch plate & hung it back up without me even asking.  He's an old pro at this painting thing.  Such a sweetie.


Looks pretty good until you pan out & see the chaos surrounding the bunk!  Ha!


I couldn't resist throwing some random bedding in there this morning...just to see what it could look like in a few months when we're hopefully at the end of the remodel.


I think it'll be magical for night-time storytelling.  I can't wait!


Random side note...just so I can look back & remember...a few months ago we jokingly told Grady this (the bunk) was going to be his new room.  Yesterday he said to me, "But mom...where is my closet going to be?".  Hehe.

Tuesday, September 10, 2013

Attic Update 4: The Bunk

The attic insulation is finally done.  It's been a journey...that's for sure!

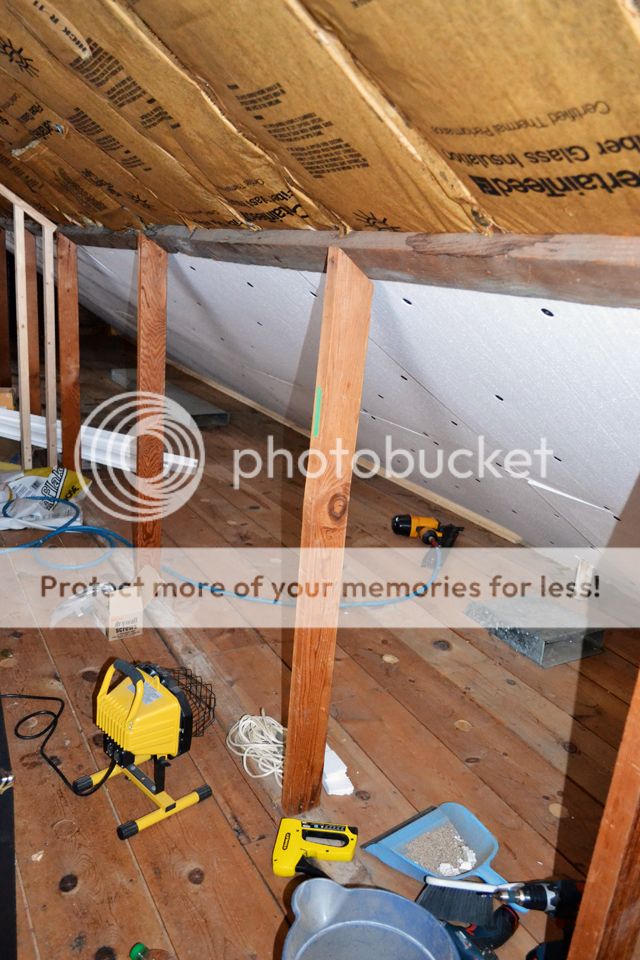
Before we start hanging drywall, there are a few smaller jobs we're planning on tackling.  One of those smaller jobs is the built-in bunk.  We've got it all framed out & wired for a reading light already.  The last thing we need to do to finish it is to nail up pine planking & paint it.  The only problem with that is that the roof inside the nook is slightly uneven.  (See how that black tape line slightly curves up on the right?  The ceiling is maybe a half of an inch low in the middle of the bunk, which would make the paneling wonky where the ceiling meets the wall...as in, the line between the paneling would be crooked...not good.)  Thus, we have to level things out before we install the planks.

That's what dad's working on now!  (Excuse the grainy iphone pic...it's all I had on me!)


Hopefully by this weekend we'll be ready to start nailing up those planks!  :)

I'm envisioning something like this: (A twin mattress will fit on the platform.)

Monday, March 4, 2013

Attic progress - early March

We made a little progress on the attic remodel/finishing this weekend.  It's such a HUGE project, so sometimes it seems like we're not getting any closer to being finished, even though we're spending quite a bit of time working on it.  I feel like once the insulation is finally ALL up, and the last remaining wall is framed up that it'll feel like we're making progress.  (Hopefully)

This past week we finished framing out the bunk, insulated under the east eave & got the foamboard insulation up under there, & are almost done sealing that off.  Once we spray a little foam in the cracks we'll be ready to fill up that storage space with junk & start working on the main areas (bedroom, closets, landing, office nook...).

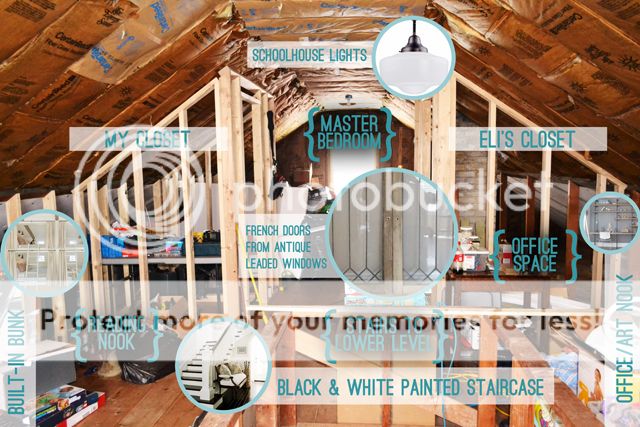
Here's a little something to help a bit with understanding the layout & where certain things will go:


And for proof that we're working away, some quick photos.  :)

 Built-in bunk progress...


Almost to the end of this itchy, dusty, dirty, cramped space...thank goodness!


Done under the eaves - bring on the storage space!  We still have to tear out those old 2x4s & frame up the walls/access panels, but it's close.


Ever wonder what construction looks like to a 3.5 year old?  Grady stole my phone & I found these gems on it this morning.


...slowly but surely we're getting closer.

Monday, November 5, 2012

Mini-Makeover: Bookshelves

We had a weekend full of smallish projects.  On Saturday, dad & I spent a few hours in the attic insulating.  Although the attic is completely unfinished, the previous owners did have it insulated fairly well.  There were just a few areas where we chose to add some extra insulation - mainly the line where the roof meets the main level walls.  Which means that it was 4 itchy hours of sliding around on our backs under the eaves.  Fun stuff!  The good news is that we're now toasty warm, framed up, & ready to wire!

The next job I tackled was a lot less physical & only took about 20 minutes!  Grady has a built-in bookcase in his room that was being completely overrun with his books.  I had tried a few months ago to arrange them by color, but that method just wasn't working for several reasons.  I'm all about organizing by color (my closet is color coded), but the boys in my life sadly are not!  Here's a shot of what the shelves looked like before I started - yikes!


Excuse the photo quality...Grady's room is SO dark at all times of the day & this photo was taken at night to top it off.  Anywhoo, you get the idea!

I started by taking every single item off the shelves & organizing them by size on the floor.  I also eliminated all of the books on the top shelf as they're chapter books that will be too old for him for several years anyway.  Might as well free up that space for something that he actually uses/can enjoy, right?  There was also a stack of 10 or so books that were either repeats, or that he & I didn't really care for that will either go to his cousin or in the garage sale pile.


 After sorting everything by size, I just loaded it all back onto the shelves in random stacks.  It's not perfect, but it doesn't hurt your eyes to look at either!  


P.S. The folding ruler in the above shot is actually what we use as Grady's growth chart.  We just unfold it, have him stand in front, & mark off how tall he is with a Sharpie right on the ruler.  It extends to 6.5 feet, so it should last at least through junior high!  I love how it's simple, not obnoxious, & is completely portable!


Isn't it insane how just taking out the chapter books & a small stack of books that we don't read freed up SO much space (for more books!)???

Blogging tips