I think like it's safe to say that all of our family & friends have received their Christmas cards by now (hehe). So here are the 2012 Starzl family Christmas cards for your viewing pleasure! (This is the first time that the card hasn't been all about Grady...he's the one most people care about seeing after all!) I thought it turned out pretty cute, even with our mugs on there as well...
(front on left, back on right)
And a look back at the last few years of holiday cards...
2011 (front on top, back on bottom)
2010
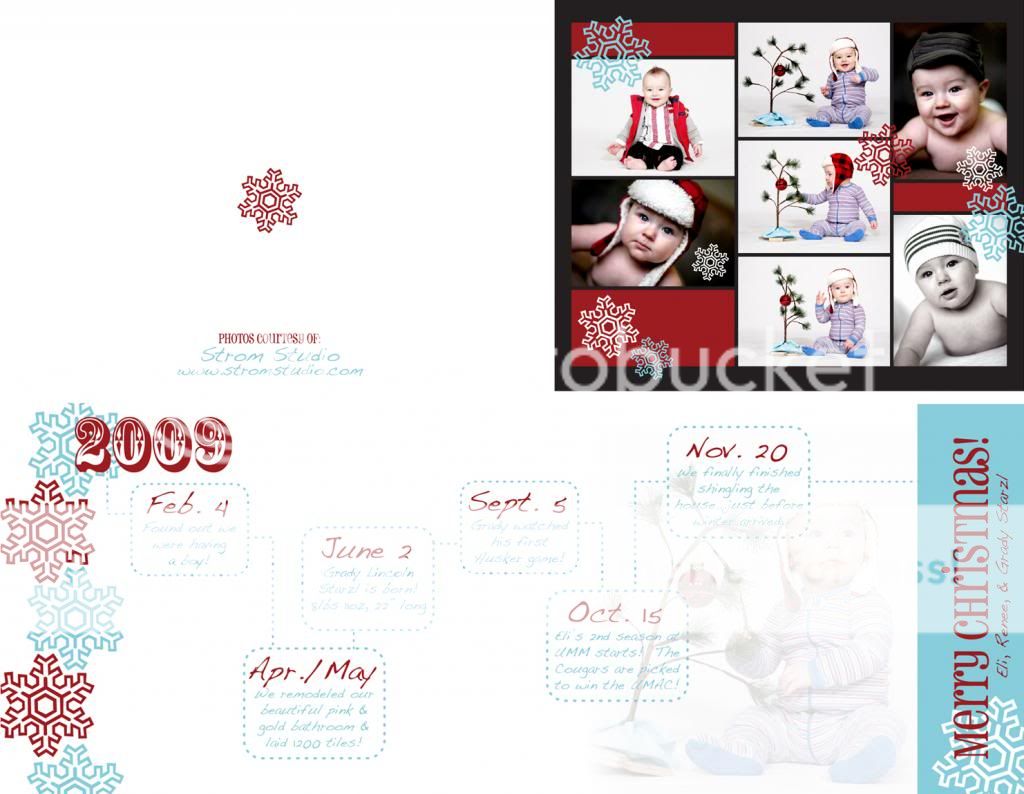
2009 (front/back on top, inside on bottom)
Hope you all had a wonderful Christmas!
Thursday, December 27, 2012
Friday, December 14, 2012
Christmas Tree Farm Photo Shoot
Posted by
Renee
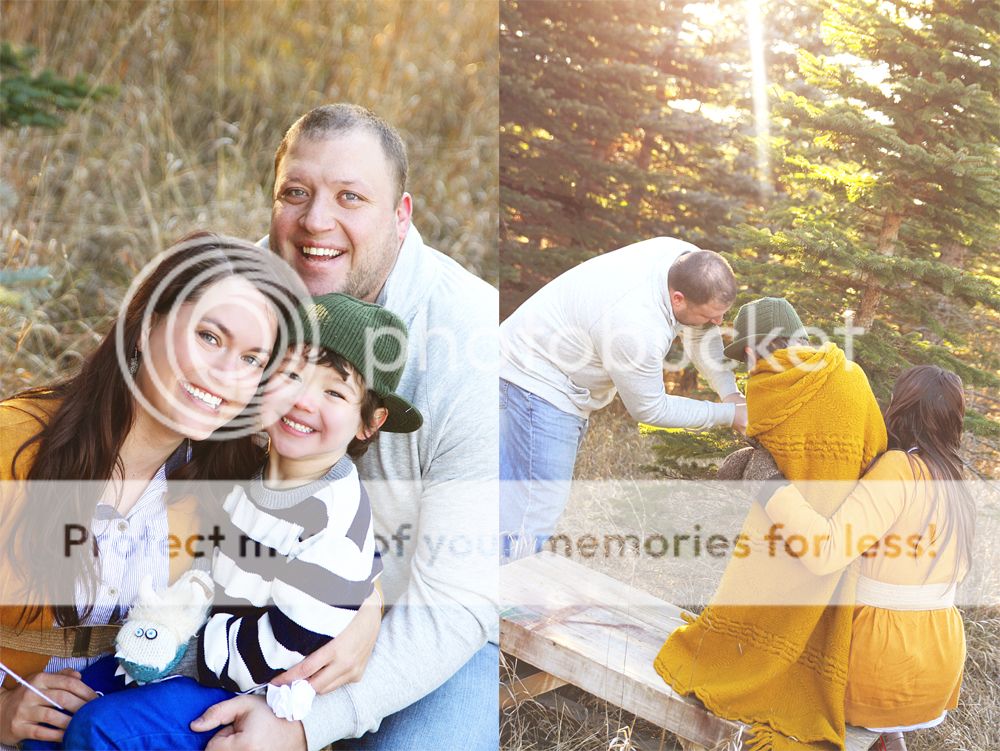
A couple of weeks ago we had family pictures taken by one of my very talented high school friends. I'm embarrassed to say that Grady is 3.5 years old & this is the first time we've done formal family pictures. Yikes!
I came up with the idea to do a shoot at a local tree farm while we chose & cut down our tree. I had made a quilt, bought an awesome vintage thermos & some old mugs, stayed up late the night before making homemade marshmallows, & made 2 strings of garland to hang from the trees. We ended up using none of it - wopwop. The morning was cold, we weren't dressed that warm, & Grady was WILD. (Most likely due to the fact that he was freezing.)
That being said, I was worried that the whole session would be a giant flop. I really was just hoping for one useable picture for our Christmas cards. I should have given more credit to Lindsey. She was able to work her magic & got several beautiful shots of Mr. Crabbypants. It might not have turned out exactly as I had envisioned, but I'm in love with the shots we got!
I'll share my Christmas card design next week after they've all arrived at their destinations!
Tuesday, December 11, 2012
Trimming the Tree
Posted by
Renee
This past weekend we finally put up our (big) Christmas tree. I'm typically a day after Thanksgiving decorator, but this year we were getting a real tree & had to wait until after our family pictures on the 3rd to do it! (I'll share those tomorrow!)
Grady was all aboard helping decorate this year. He helped with everything from stringing up the Christmas lights to perfectly placing each little ornament.
In years past I've gone with kind of a rustic "theme"...plaid/flannel ribbon, lots of flowers and cattails, woodsy animals, & rustic wooden stars. This year I wanted to change it up some without having to go out & buy all new ornaments. I told Grady we could only use ornaments & flowers that were green, white, or brown. I'm really loving how it's a little more simplistic this year! Although my tree skirt doesn't match...maybe I'll have to make a new one this weekend....hmmm...
I made the flower pom-pom garland after reading this tutorial...it was super easy, but kind of time consuming. I'll for sure do it again in the future though!
He's so focused! Gotta get it in there perfectly - wonder where he gets that from? :)
And just for reference...here's what our tree has looked like the past few years. And yes, that is our elf on the shelf zip-lining to the tree! (Excuse the photo quality...the photos below were taken on my iphone.)
I do still like the old tree...but I'm really loving the simple color scheme of the new one. There's also something fun about having a real tree! Even though I get a little sad every time I see a tree get cut down. I also have a hard time cutting flowers out of the garden myself...I just feel like I'm hurting the plant...I know, it's silly & I'm weird. :)
Tuesday, December 4, 2012
The Most Handsome Ringbearer You've Ever Seen
Posted by
Renee
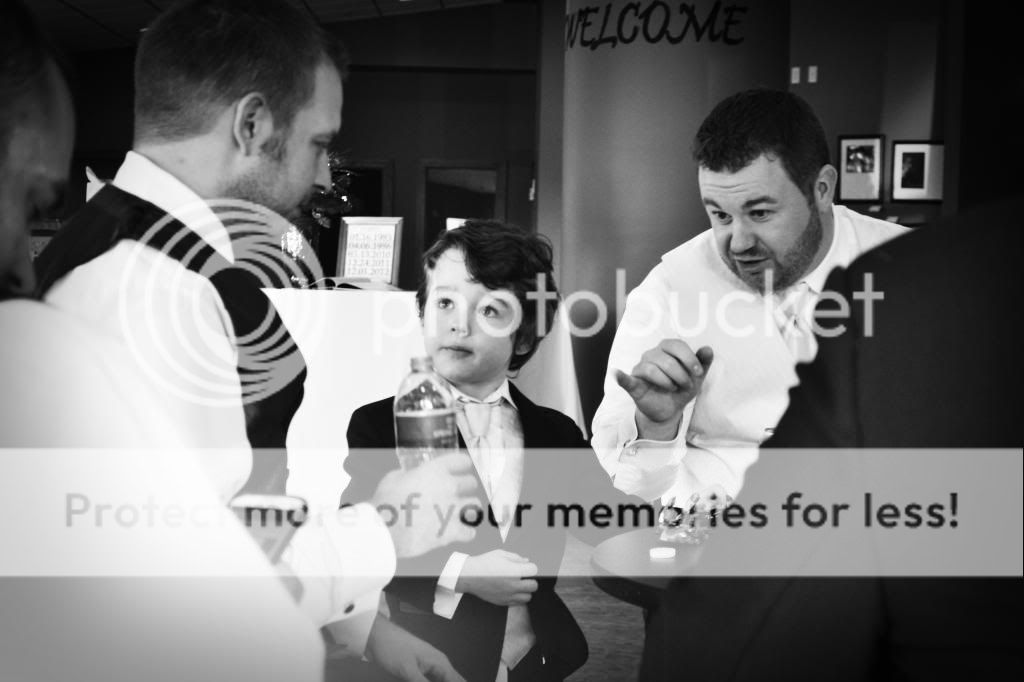
Get ready for some cuteness overload...this little dude got dapper this weekend as the ring bearer in one of Eli's best friends' weddings.
He did such a good job at the wedding despite a long night the night before.
And getting some questionable advice from the groom & one of his men. It looks like it was serious...maybe how to make a good impression on the flower girl?
It must have worked, too, because he got that dance! Dancing his pants off at the reception...although he told me he wanted to keep his pants on...good choice, son!
Luckily, we were staying in the hotel that was connected to the reception venue, so Grady & I were able to duck out & go to bed early (well, earlier than dad) when the festivities got to be too much for him to handle that late at night & after no nap (yikes!).
Late night fun in the hotel room mirror.
Congrats to the beautiful couple! We're so happy that you found each other & that we were able to help you celebrate your love!
Friday, November 30, 2012
Yarn Wreath Wedding Gift
Posted by
Renee
So, Eli & Grady are in the wedding of some very good friends this weekend. I've been wanting to try my hand at making a yarn wreath with felt flowers for a while now, so I thought I'd give a "love birds" wreath a whirl!
I bought a foam wreath (I think around 12" diameter?), some heather gray yarn, & a few quarter yards of fun fabrics & got to work. I started by wrapping the wreath tightly in yarn...I pinned the start point down & did not wrap any yarn on top of it. I was planning on unpinning it once I got all the way around & just tying my two ends together.
Around & around I went until I had all of the foam covered with yarn. Then, I pulled out the pins that were securing the beginning end of yarn, tied the two ends in a knot, & trimmed off the excess yarn. Easy peasy - although it took a while to wrap the yarn all the way around!
Ok, then I cut out the bird shapes in various fabrics. (I made three of them in a couple of different sizes so I could decide later which two would work the best.) The pattern came from Spool, & here's the link to the free pdf if you want it!
Sewn, stuffed, & sitting...
I Googled "felt flowers", read a few tutorials, & used bits & pieces of that information to create my own out of some felt scraps I had on hand from other projects. I'd make a few flowers, pin them randomly to the wreath, & fill in until I felt like it looked right to me.
After gluing everything down & embroidering a little banner, I ended up with this...
Hopefully the bride & groom to be like it! :)
Tuesday, November 27, 2012
Here comes Christmas!
Posted by
Renee
We didn't venture out much this Black Friday...one quick trip to Herberger's for a couple of door-busters was enough! Instead, we spent the day un-boxing Christmas decorations & putting up Grady's tree & Nativity set. He picked out some jingle bells & a mushroom ornament to add this year & was SO excited to hang them!
Each ornament had to be perfectly placed...in just the right spot.
We also dug out the Christmas books & read most of the stack (some favorites more than once, of course!).
That afternoon/early evening our town had a little festival for the kids in preparation for lighting the Christmas lights downtown. There was hot apple cider, pretzels & popcorn, Santa & Mrs. Claus, real live reindeer, & a horse drawn "sleigh". We didn't look at the weather before we left & didn't dress appropriately at all...brrr!
Grady was too shy to sit by Santa & the Mrs. on his own, but he did give the big guy a high-five before we left, so I told him that I was pretty confident that he'd make the nice list for that alone!
After visiting with the Claus', we snuggled up on thesleigh trailer & went for a quick ride to the sound of hooves & jingle bells. It was so fun, but also SOOO cold!
Here's to a whole month full of family holiday fun! :)
Each ornament had to be perfectly placed...in just the right spot.
We also dug out the Christmas books & read most of the stack (some favorites more than once, of course!).
That afternoon/early evening our town had a little festival for the kids in preparation for lighting the Christmas lights downtown. There was hot apple cider, pretzels & popcorn, Santa & Mrs. Claus, real live reindeer, & a horse drawn "sleigh". We didn't look at the weather before we left & didn't dress appropriately at all...brrr!
Grady was too shy to sit by Santa & the Mrs. on his own, but he did give the big guy a high-five before we left, so I told him that I was pretty confident that he'd make the nice list for that alone!
After visiting with the Claus', we snuggled up on the
Here's to a whole month full of family holiday fun! :)
Monday, November 19, 2012
Attic Update - Phase 1
Posted by
Renee
In preparation for the winter, dad & I have been working on better insulating the attic. When we started, we had 4" insulation on both the ceiling & the walls, but certain areas were pulled aside/torn off because of some water issues we had while we were shingling the roof. What would seem like a quick & easy fix was actually way more complicated. If you remember from my last attic post, this is what we began with...see the missing pieces & the insulation hanging down under the eave on the left? Gorgeous right?! Ok, not quite.
Well, we didn't want to just staple up the old stuff, because we knew that this winter we'd be finishing the attic & also knew that we'd be relocating some lighting & rewiring it at the same time. Meaning we'd need access behind the insulation to run new wire. Soooo, before re-hanging the insulation, we had to frame up a few walls (that will be our closets), as well as run the new wire to the new light locations.
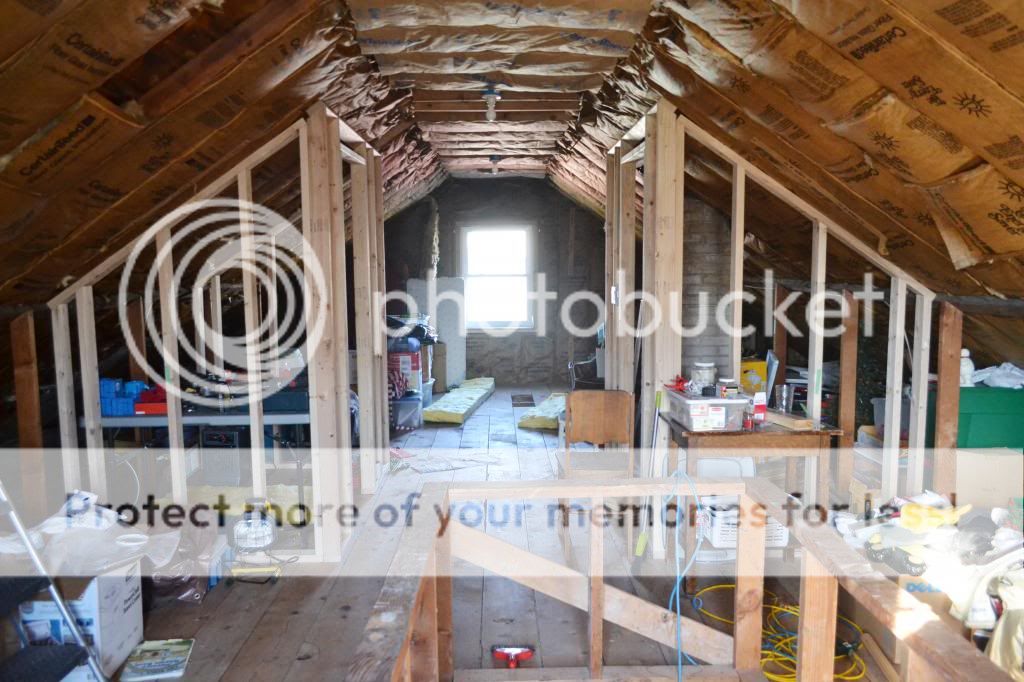
OK, so here it is after the first step of framing up those closets. This photo is taken from the top of the stairs looking toward the future bedroom. You'll enter through French doors, with my closet to the left & Eli's to the right. (Look at that crazy pile of baby stuff against the back wall...it's insane how much gear kids need!)
After we framed up the closets, we stapled up all of the old (but still usable) insulation that was hanging down under the eaves, in addition to filling in some gaps where the roof met the main level walls. It was super fun crawling/scooting around down there. Let.me.tell.you.
We also had to tear out the middle (flat) portion of the ceiling insulation to level out the rafters (in prep for drywall). This allowed us to have better access to wiring as well as get a little bit thicker insulation up there than what we had before.
After the wiring was in place, we cut a few rolls of insulation into 4 foot strips to fill in between the new rafters & stapled them up. (My hand is still sore from the staple gun by the way.)
We've just got a few panels in the middle to hang & we should be all set for phase 2: finishing framing.
Grady was a trooper just hanging out & watching. This is his incredibly bored "aren't you done yet, mama? Let's play dragons." face...
Just begging for some tickle-time & some smiles...that's better!
Here's the "un-official" to-do list:
We're aiming to get all of the insulating done (foam board is next) in the next couple of weeks, then take a break until after Christmas.
Slow & steady, but it'll be totally worth it in the end! :)
Well, we didn't want to just staple up the old stuff, because we knew that this winter we'd be finishing the attic & also knew that we'd be relocating some lighting & rewiring it at the same time. Meaning we'd need access behind the insulation to run new wire. Soooo, before re-hanging the insulation, we had to frame up a few walls (that will be our closets), as well as run the new wire to the new light locations.
OK, so here it is after the first step of framing up those closets. This photo is taken from the top of the stairs looking toward the future bedroom. You'll enter through French doors, with my closet to the left & Eli's to the right. (Look at that crazy pile of baby stuff against the back wall...it's insane how much gear kids need!)
We also had to tear out the middle (flat) portion of the ceiling insulation to level out the rafters (in prep for drywall). This allowed us to have better access to wiring as well as get a little bit thicker insulation up there than what we had before.
After the wiring was in place, we cut a few rolls of insulation into 4 foot strips to fill in between the new rafters & stapled them up. (My hand is still sore from the staple gun by the way.)
We've just got a few panels in the middle to hang & we should be all set for phase 2: finishing framing.
Grady was a trooper just hanging out & watching. This is his incredibly bored "aren't you done yet, mama? Let's play dragons." face...
Just begging for some tickle-time & some smiles...that's better!
Here's the "un-official" to-do list:
Frame up closets.Patch up insulation under eaves.Re-wire lights.Level out ceiling rafters.Insulate peaks.- Hang foam board insulation on the roof.
- Frame out built-ins & walls.
- Wire electrical outlets.
- Hang drywall (tape/mud/sand).
- Prime & paint walls & ceiling.
- Hang lights.
- Paint & hang trim.
- Finish floor.
- Paint & install new stair railings.
- Paint & stain stairs.
- New window (last one in the house!).
- Install closet systems.
- Build & hang French doors.
- Build doors to under eave storage.
- Tear out door to main level & repair drywall.
We're aiming to get all of the insulating done (foam board is next) in the next couple of weeks, then take a break until after Christmas.
Slow & steady, but it'll be totally worth it in the end! :)
Subscribe to:
Comments (Atom)


