Showing posts with label DIY. Show all posts

Friday, October 25, 2013

Haunted Halloween Doll House

A week or two ago I saw this Haunted Dolls House on the Mr. Printables website & knew that Grady would love it.  I also knew that I wanted to make one & had a ton of ideas on how to tweak & personalize it!

Mr. Printables has a printable (obviously) template to help you cut out the walls & floors, as well as some paper pieces to use in decorating your house.  (I didn't use the paper pieces on mine.)  They also give you some tips on creating spooky peg dolls.  I found inspiration for the rest of the peg dolls by searching on Pinterest, Google, & Etsy.


Meet this motley crew of spooks & ghouls!  Grady & I both love the kitty best.


I even painted a Grady peg doll dressed up in his Lone Ranger Halloween costume & surprised him with it this morning!  He just giggled when he saw it & asked where I got the pumpkin halloween bucket.  (I have a jar of pumpkin potpourri that I painted & glued a felt handle on.)  He's all ready to go trick-or-treating at the haunted house - if he dares!  Good thing he's got his 6-shooter along!


Some creepy monsters waiting by the rope ladder.


I love the ghost peeking through the window!


The pieces of the house slide easily together so you can take it apart making it simple to store!


A few close-up shots of our motley crew!


Some of the things I tweaked:
  • I painted the house with chalkboard paint.  (I thought it would be fun to draw different things on the walls & floors & be able to erase them!)
  • We made a whole fireplace instead of just a chimney.
  • Added a fence around the porch.
  • Added a crooked ladder to get upstairs.
  • Added a rope from the 1st to 2nd story (Grady's brilliant idea!).
If any of you have created a Halloween haunted doll house or peg dolls, please share them!  I think I've found a new addiction.  I'm just imagining how fun a "Night before Christmas" house would be...or maybe Santa's workshop???

Wednesday, June 12, 2013

How to: High Flying Horizontal Tire Swing

I've been getting a ton of questions about how we made Grady's tire swing so I thought I'd put together a quick tutorial for those who are curious & want to try something like this in their own backyard!  It's really an easy project.

Supply list:
1 long length of chain or rope (enough to wrap around your tree branch, connect, & still hang approx. 7 feet off the ground)
3 4'-6' lengths of chain (we used one with a 500lb weight limit - better safe than sorry)
3' length of hose
5 quick links
3 eye bolts
6 lock nuts
6 large washers
14"-16" tire (we got ours free from a local tire shop)


First, clean up your tire & make sure there's nothing on the surface that could snag clothing or scratch.  Then drill 3 holes in the top of the tire for the hardware to go through.  Flip the tire over & drill several holes on the bottom for drainage.  You don't want water to sit inside the tire & splash the rider or breed mosquitos - ew.


Take each 4'-6' length of chain & use the quick links to hook them to your eye bolts.  Thread a nut onto your eye bolts & slide one of the large washers on behind it.  Feed the eye bolts through the holes in the top of your tire.


Inside the tire, slide on another large washer & lock nut onto the bolt & screw 'em on tight.


Take your long chain & feed one end through the hose.  (Tip: Ours was a pretty snug fit, so we sprayed some Pam on the chain & it slid right through!)  Hook the end of the chain to the rest of the long chain with another quick link.  Almost there!


Take your last quick link & hook the hanging end of your long chain to the three shorter chains that are connected to your swing.  Everything I read said that 4'-6' length works best.  Make sure all of the quick links are super tight - you don't want your swing detaching mid-air & tossing your kid (or you).  Believe me, after having that happen to me & landing on my neck not once, but twice in my youth (with a rope tire swing), I'm super paranoid about it!  I still have neck problems & totally blame it on the falls from the swings!

I'm a sucker for any type of swing, but this big guy is probably my favorite ever.  It goes SO high & swings FOREVER.  One push & it'll go for 10 minutes.  (Easy babysitter for when you're busy weeding gardens or spray-painting your next project!)


(You can't really tell in the pictures, but the swing hangs around 10' out from the tree trunk.  If you pushed the swing hard enough in a circle you could possibly hit the tree, but it would take a lot.  Use caution & be sure you hang your swing far enough away from obstacles so no one will get hurt!)

Let me know if any of you have attempted, or plan on putting a tire swing up in your yard...or had one when you were a kiddo.  I feel like it's something that Grady will remember forever...

Wednesday, May 8, 2013

Pinterest Challenge: Reversible Painted Doormat

Today's the day!!!


If y'all remember, my inspiration was a handful of wooden doormats from various sources.

I combined a bunch of them together to get a mat that jived a little better with my personal style.  Without further ado, my "Reversible 2x2 Wooden Slat Doormat".  How's that for a title?!


It took a bit of time...maybe 4-5 hours total?  Maybe not even that long.  But it was a super satisfying, fairly simple, & fun project to tackle!

First thing's first...prep:

After all of the paint was slapped on (I used something like 12 colors...all of which I already had on hand), I thought it was a little bright & new looking for my taste.


So, in came the old sander.  (I started with a sanding block, but for the sake of every muscle in my arm, I quickly turned to my electric palm sander - much easier!)


Then I wiped another layer of stain right over the paint.  (You can see the finished slats on the left, the un-stained slats on the right.)


Took it outside & sprayed a clear sealing coat on all sides of each slat.  It took a little while if you count dry time, but I kept randomly coming back to it over the course of an afternoon to rotate & spray each side.

Look how brown our grass still is...the snow literally JUST melted.


After the clear coat had cured, I brought the slats inside to tie together.  I measured out two lengths of rope that were each 2.5x (75ish inches) the overall width of the slats (30ish inches) to make sure to leave enough extra length for the knots between each slat as they use a lot more rope length that going straight from end to end would.  (Hopefully that makes sense?)

I also taped of the end of each piece of rope so it slid through the holes easier & didn't unravel at all as I went down each row.  I'm smart like that.  :)

 
Then I strung the rope through, & tied knots between each slat so they didn't butt up against each other.  Everyone needs their personal space.


Random strange thought: Let me just take a minute to ponder why, if we are supposedly evolved from apes, did we not keep their handy dandy grabby feet?  I'm serious...if we indeed evolved into superior beings like a lot of folks believe, would we not have kept our "ancestors'" best qualities?!  How often could you use another foot hand?  I've often thought about how nice it would be to have a tail too...better balance, could swing from branches, carry shopping bags, etc.  Yeah, I'm weird...but think about it!

Case in point...if I had a monkey foot it would have been a whole lot easier holding the slats while pulling knots tight...just saying!


Moving on...

After my hands were raw & tired from tying 40ish knots, I was left with this beaut!  Isn't she purty?!  I'm so glad I sanded her down.  I only wish I was aging as nicely...


Oh!  And now for the reversible part...in case you're in a "natural" mood...  I feel like it could be really cool in a bathroom.  You know, if you sealed it with some Spar finish or something?


Also, be sure to check out what EmilyKatie, & Sherry did!

It's time to share your projects!

Wednesday, May 1, 2013

This is HUUUGE...


It's time for the Pinterest Challenge again!  You know, the brilliant creation that Sherry @Young House Love & Katie @Bower Power came up with to get all of us actually DOING all of those cool projects that we continually pin, but rarely act on!

Last challenge my dad & I built an ipod/iphone amp out of wood.  It rocks.  (Hehe...punny!)
Also, last fall I made a huge military style chalkboard map that my almost four year old loves.

Now for the other part of the announcement...drumroll, please...I get to co-host with these 3 lovely ladies this spring!!!  How insanely amazingly awesome is that?!?  Beyond excited.

Emily from Sparkle Meets Pop
Katie from Bower Power
Sherry from Young House Love

If you're not familiar with the Pinterest Challenge, it goes something like this:
  1. Take a look through your pins (or pin something new) that you want to try.  No project is too big or too small!
  2. Complete your project by Wednesday, May 8th.
  3. Post about it on your blog, or take some photos to share in the comment section.
  4. Come back here around 10am on May 8th (& also to Emily, Katie, & Sherry's corners of the interweb) to link up & share your finished project with all of us!
Some additional notes:
  • Feel free to grab the banners off the top of this post to use on your own blog.
  • Remember to link not only to the pin where you got your inspiration, but also to the original source - spread the love! 
  • Pinterest doesn't know about this challenge (or endorse, sponsor, etc.) - it's just plain fun!
And now...for what I'm pinning & planning!  One of the very first things I ever pinned was a wooden door mat from Martha Stewart (#4 below).  It's pretty paint had me from the second I saw it!  And the arrival of spring (finally) means I can't wait to get started with outdoor projects!  I've got a few ideas swirling around about how to combine a lot of these ideas in this crazy head of mine.  Haha.


Sources:
one: Yellow Brick Home
two: French Bull (No longer available)
three: How Does She
four: Martha Stewart
five: Lowes Creative Ideas

I can't wait to see what you all come up with!

Friday, April 26, 2013

Attic Update: French Doors & Power

My cousin Keith & his wife Megan own an awesome old home in Michigan that they're renovating.  A couple of years ago when I was there, Keith showed us a shed full of all of the old windows from the house.  They weren't able to use all of them at their place, & they couldn't find anyone to take them off their hands, so I kindly volunteered to steal a few from them.  A few months later when they came to MN, they were nice enough to haul a few our way!

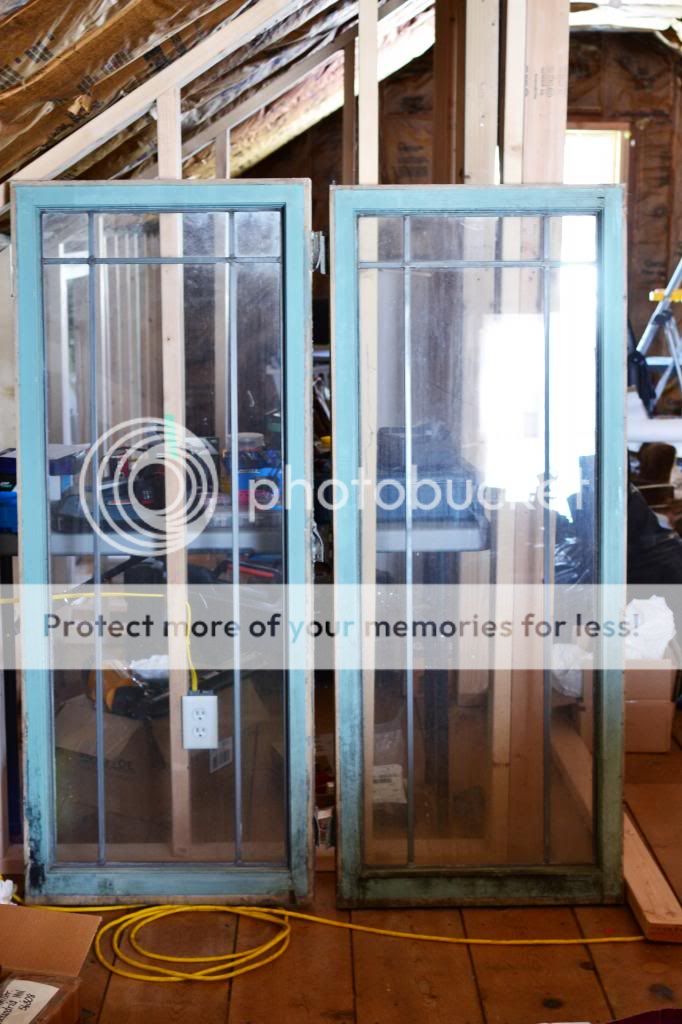
A year & a half later, I know just what I'm going to use two of them for...French doors!  They'll need a little TLC before they're functional as doors, but I'm super excited about how they're going to look.  First we have to sand them down, then add some length to the bottom with some sort of inlaid panel.  After that I'll paint them.  I have a few colors in mind, but nothing set in stone yet.  (The blue they are now is even pretty!)  :)
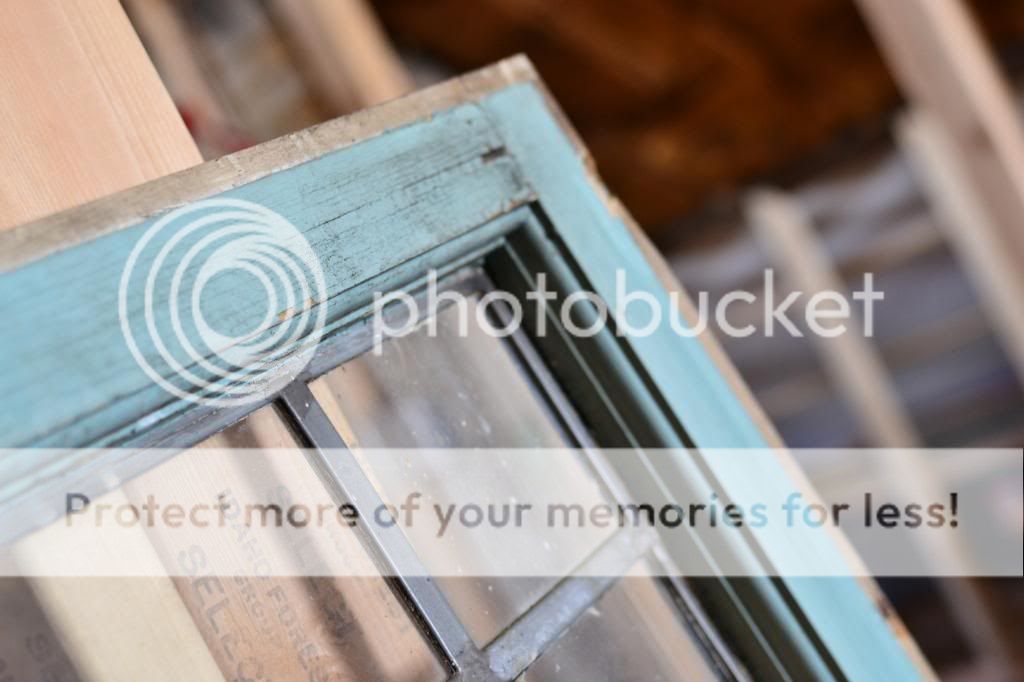
Aren't they awesome?!   Love.


In other news, the power is on!!!  No more extension cords down to the kitchen - woohoo!


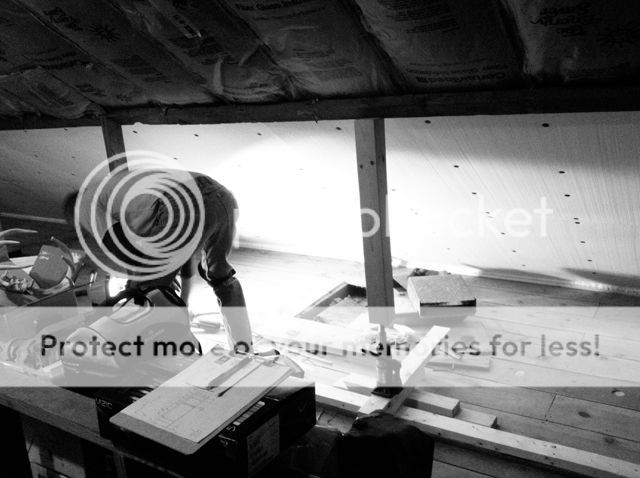
Last night dad (nailing), myself (cutting), & Grady (carrying) worked on getting everything ready for drywall.  There was one small wall we had to finish framing in Eli's closet, as well as adding "nailers" to some corners so we have a solid place to screw the drywall into.

It seems like we've been working on the attic for months & not getting anywhere.  That's not true, of course, we ARE making progress...but from here on out I think it will actually start to FEEL like it.  (Drywall going up, floors getting finished, trim, stair rails, etc.) 

This weekend the plan is to frame up the doorway (the LAST bit of framing we have to do!) & install the platform for the bunk.  Here's the rest of the list:
  • build French doors
  • new window
  • foam board on peak
  • drywall (tape, mud, prime, paint)
  • planks on end walls & bunk
  • trim & board & batten walls
  • paint & hang lights
  • tear out stair door & header & repair
  • stain floor & stairs
  • put up stair rails & paint
  • build doors to under eave storage
  • closet systems
  • hardware (French doors & storage access)

Monday, April 22, 2013

Mini Makeover: Yarn Wrapped Lamp Cord

Amidst some craziness this weekend (a BAT in the house - ew!), I had time for a satisfying, quick little project.  Shortly after Christmas, with some Target gift cards, I bought a cool little floor lamp for reading.  (Our living room lighting is horrible.)  I really love the light, but the cord drove me insane.  It wasn't horrible, but I really don't like seeing cords...ever.  Is that just me or are there others with cord hate out there?

Anywhoo...here's what she looked like before her makeover:


See what I mean?  It's not horrible, but not at all pretty to look at either.  :)

Enter heather gray yarn.  I just tucked the end under & wrapped the yarn around & around the cord until I reached the end.  Then I just tied it off a few times & called it good.


It's still a cord - but it's a pretty one now.

Simple things...

Thursday, March 21, 2013

Raising the Roof

Our house was built in 1946.  In the 67ish years of it's existence, no one has ever used the attic for anything but storage.  In other words, it hasn't really been touched since the post-war carpenters hung up their hammers and nails long ago.  (Can you imagine building a house without power tools?!?)

I'm not sure if it was standard practice back then, but the roof-supporting studs on the two sloped sides of the attic were randomly spaced at around 4 feet apart.  Today, you'd normally put a stud up every 16".  Plenty of support, and easy to hang drywall as you'll always know where there's a stud, and perhaps more importantly, 8 feet and 4 feet are both divisible by 16 inches...perfect for hanging drywall/sheetrock without making a bazillion cuts.

Anywhoo...after 67 years of the roof being supported by too few studs, it was sagging just a little in the middle.  By just a little I mean an inch or two...not really a big deal (the roof wasn't going to come crashing down or anything), but enough so that my perfectionist dad had to bring over his arsenal of hydraulic jacks so we could get busy "raising the roof".  Quite literally.  :)

Excuse the poor iphone pics...I didn't feel like running downstairs to grab the "nice" camera!  (Hopefully dad doesn't mind the "booty shot" either...hehe!)


First we jacked up one end of the roof on a handy little platform that allowed us (dad) to knock out the old studs in the area, and slip a level, "nailer" 2x4 underneath the jack and on the floor so we'd have a nice surface to nail the new studs to.  Hence the name, "nailer".

After that was in place, we made sure the roof was level, and cut 2x4's to the correct height and pitch of the roof, slid them in at 16" apart, used the nail gun to attach them to the nailer and the roof, and repeated this process down the lengths of both sides of the attic.

It's a lot of extra work moving jacks and making sure things are perfectly level, but if you're doing something, you might as well do it right...right?  Plus, it'll save headaches and look better down the line.

I'm hoping that over the course of the rest of the week/weekend we can finish up all of the framing (one wall in Eli's closet, the frame around the French doors, some access panels for the storage areas) and maybe get started on wiring for the outlets.  It'll be SO nice to have power up there (we already have light) and not have to run extension cords down to the kitchen!

After that, we only have a few more things to do (sarcasm):

  • Finish hanging foam board insulation on the roof.
  • Hang drywall (tape/mud/sand).
  • Prime & paint walls & ceiling.
  • Hang lights.
  • Paint & hang trim.
  • Finish floor.
  • Paint & install new stair railings.
  • Paint & stain stairs.
  • New window (last one in the house!).
  • Install closet systems.
  • Build & hang French doors.
  • Build doors to under eave storage.
  • Tear out door to main level & repair drywall.


Wednesday, February 27, 2013

Pinterest Challenge - Dock Box inspired iphone amp

Since Sherry & Katie's last Pinterest Challege this fall (where I made a chalkboard map), I had been eagerly awaiting the next one!  It's such inspiration looking through everyone's projects!!!

http://createandbabble.com/wp-content/uploads/2013/02/winter-challenge.jpg

Ok, so this round I had a few ideas: wallpapering the entry way ceiling & tiling a herringbone pattern on the floor in there were a couple of contenders, but ultimately I chose a smaller scale project...a wooden iphone/ipod amplifier.  The thing doesn't use electricity.  The sound from the iphone's built-in speakers gets sent through channels in the wood, & out through holes.  The concept is kind of like how sound gets amplified through the hollow inside of a guitar/violin/etc.  Neato.

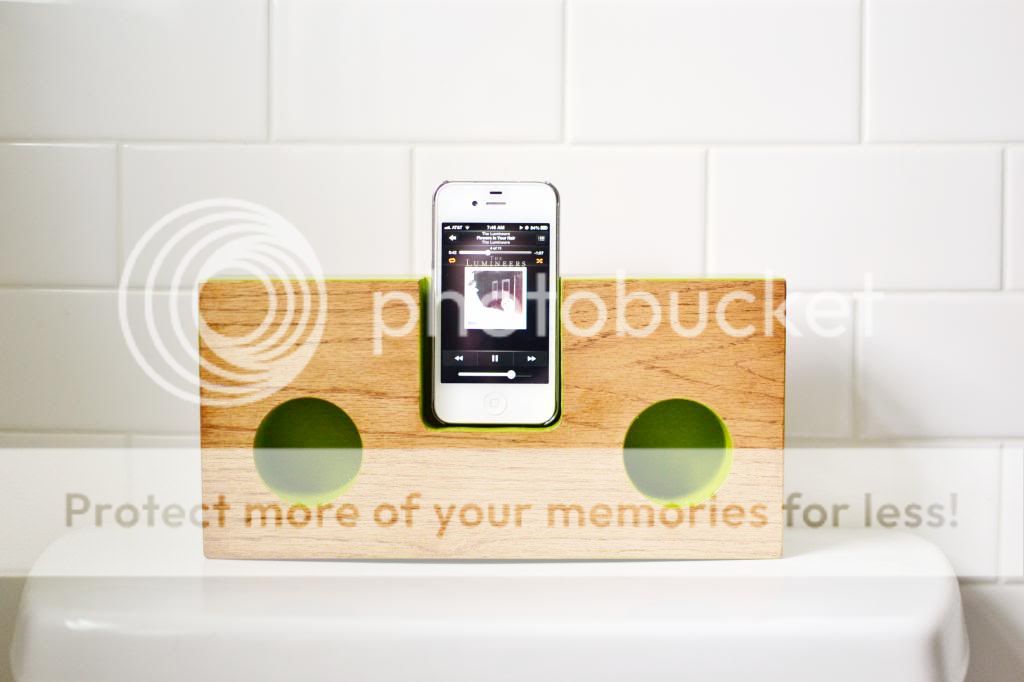
Here's the final product...in the place I think we'll use it second most...the loo.   (Once summer hits I'm positive we'll use it on the porch daily.)

It's pretty, completely portable (no need for an outlet) - & best of all it WORKS!


I've seen a few versions on Pinterest from this Etsy Store...and I found plans here

The thing was pretty simple & straightforward to make, but you do need some "more than basic" tools to do it.  Luckily I know someone who has a huge workshop that's the envy of the neighborhood - thanks dad!  :)  Let's get to the pics...

That's my dad...he's always willing to help me out with my crazy projects...he's the best.


I can't wait to get home from work & jam.  ;)
Blogging tips