Showing posts with label Pinterest Challenge. Show all posts

Wednesday, May 8, 2013

Pinterest Challenge: Reversible Painted Doormat

Today's the day!!!


If y'all remember, my inspiration was a handful of wooden doormats from various sources.

I combined a bunch of them together to get a mat that jived a little better with my personal style.  Without further ado, my "Reversible 2x2 Wooden Slat Doormat".  How's that for a title?!


It took a bit of time...maybe 4-5 hours total?  Maybe not even that long.  But it was a super satisfying, fairly simple, & fun project to tackle!

First thing's first...prep:

After all of the paint was slapped on (I used something like 12 colors...all of which I already had on hand), I thought it was a little bright & new looking for my taste.


So, in came the old sander.  (I started with a sanding block, but for the sake of every muscle in my arm, I quickly turned to my electric palm sander - much easier!)


Then I wiped another layer of stain right over the paint.  (You can see the finished slats on the left, the un-stained slats on the right.)


Took it outside & sprayed a clear sealing coat on all sides of each slat.  It took a little while if you count dry time, but I kept randomly coming back to it over the course of an afternoon to rotate & spray each side.

Look how brown our grass still is...the snow literally JUST melted.


After the clear coat had cured, I brought the slats inside to tie together.  I measured out two lengths of rope that were each 2.5x (75ish inches) the overall width of the slats (30ish inches) to make sure to leave enough extra length for the knots between each slat as they use a lot more rope length that going straight from end to end would.  (Hopefully that makes sense?)

I also taped of the end of each piece of rope so it slid through the holes easier & didn't unravel at all as I went down each row.  I'm smart like that.  :)

 
Then I strung the rope through, & tied knots between each slat so they didn't butt up against each other.  Everyone needs their personal space.


Random strange thought: Let me just take a minute to ponder why, if we are supposedly evolved from apes, did we not keep their handy dandy grabby feet?  I'm serious...if we indeed evolved into superior beings like a lot of folks believe, would we not have kept our "ancestors'" best qualities?!  How often could you use another foot hand?  I've often thought about how nice it would be to have a tail too...better balance, could swing from branches, carry shopping bags, etc.  Yeah, I'm weird...but think about it!

Case in point...if I had a monkey foot it would have been a whole lot easier holding the slats while pulling knots tight...just saying!


Moving on...

After my hands were raw & tired from tying 40ish knots, I was left with this beaut!  Isn't she purty?!  I'm so glad I sanded her down.  I only wish I was aging as nicely...


Oh!  And now for the reversible part...in case you're in a "natural" mood...  I feel like it could be really cool in a bathroom.  You know, if you sealed it with some Spar finish or something?


Also, be sure to check out what EmilyKatie, & Sherry did!

It's time to share your projects!

Wednesday, May 1, 2013

This is HUUUGE...


It's time for the Pinterest Challenge again!  You know, the brilliant creation that Sherry @Young House Love & Katie @Bower Power came up with to get all of us actually DOING all of those cool projects that we continually pin, but rarely act on!

Last challenge my dad & I built an ipod/iphone amp out of wood.  It rocks.  (Hehe...punny!)
Also, last fall I made a huge military style chalkboard map that my almost four year old loves.

Now for the other part of the announcement...drumroll, please...I get to co-host with these 3 lovely ladies this spring!!!  How insanely amazingly awesome is that?!?  Beyond excited.

Emily from Sparkle Meets Pop
Katie from Bower Power
Sherry from Young House Love

If you're not familiar with the Pinterest Challenge, it goes something like this:
  1. Take a look through your pins (or pin something new) that you want to try.  No project is too big or too small!
  2. Complete your project by Wednesday, May 8th.
  3. Post about it on your blog, or take some photos to share in the comment section.
  4. Come back here around 10am on May 8th (& also to Emily, Katie, & Sherry's corners of the interweb) to link up & share your finished project with all of us!
Some additional notes:
  • Feel free to grab the banners off the top of this post to use on your own blog.
  • Remember to link not only to the pin where you got your inspiration, but also to the original source - spread the love! 
  • Pinterest doesn't know about this challenge (or endorse, sponsor, etc.) - it's just plain fun!
And now...for what I'm pinning & planning!  One of the very first things I ever pinned was a wooden door mat from Martha Stewart (#4 below).  It's pretty paint had me from the second I saw it!  And the arrival of spring (finally) means I can't wait to get started with outdoor projects!  I've got a few ideas swirling around about how to combine a lot of these ideas in this crazy head of mine.  Haha.


Sources:
one: Yellow Brick Home
two: French Bull (No longer available)
three: How Does She
four: Martha Stewart
five: Lowes Creative Ideas

I can't wait to see what you all come up with!

Wednesday, February 27, 2013

Pinterest Challenge - Dock Box inspired iphone amp

Since Sherry & Katie's last Pinterest Challege this fall (where I made a chalkboard map), I had been eagerly awaiting the next one!  It's such inspiration looking through everyone's projects!!!

http://createandbabble.com/wp-content/uploads/2013/02/winter-challenge.jpg

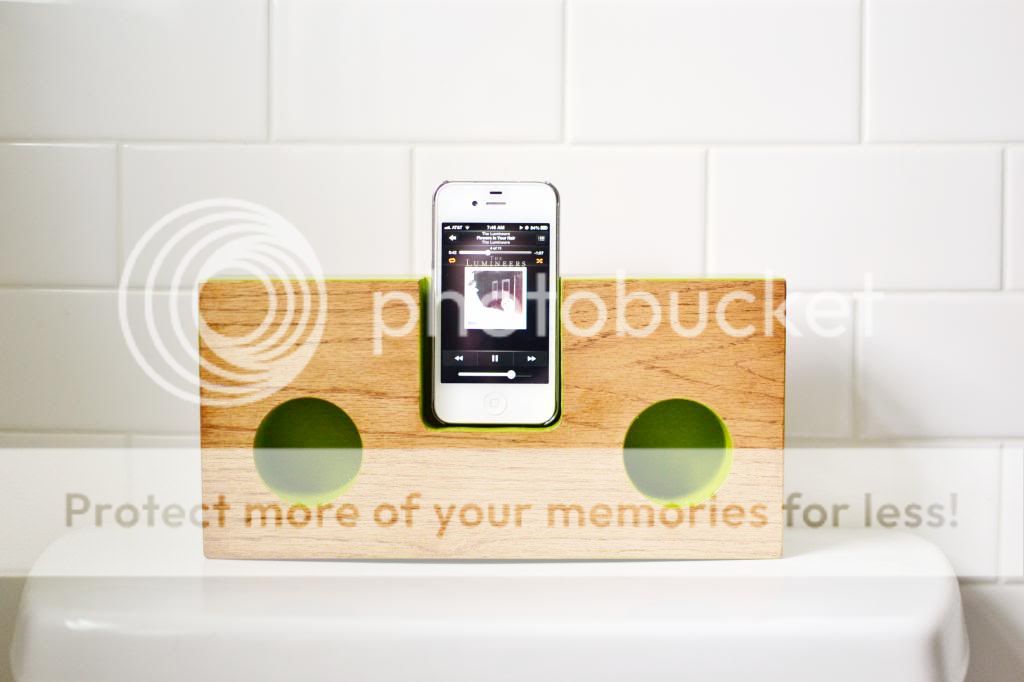
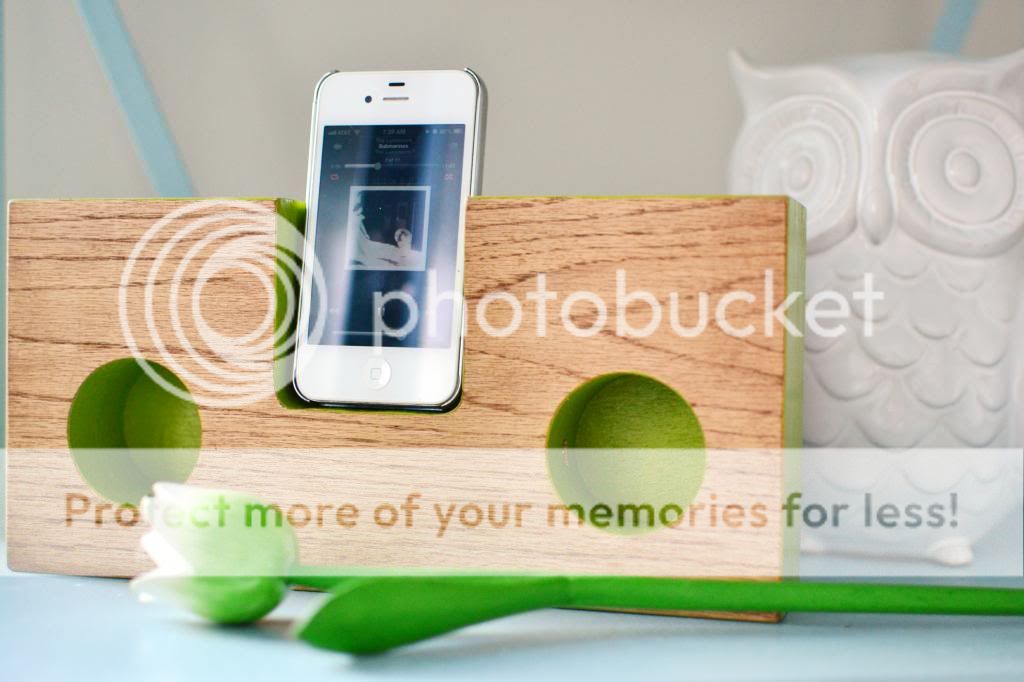
Ok, so this round I had a few ideas: wallpapering the entry way ceiling & tiling a herringbone pattern on the floor in there were a couple of contenders, but ultimately I chose a smaller scale project...a wooden iphone/ipod amplifier.  The thing doesn't use electricity.  The sound from the iphone's built-in speakers gets sent through channels in the wood, & out through holes.  The concept is kind of like how sound gets amplified through the hollow inside of a guitar/violin/etc.  Neato.

Here's the final product...in the place I think we'll use it second most...the loo.   (Once summer hits I'm positive we'll use it on the porch daily.)

It's pretty, completely portable (no need for an outlet) - & best of all it WORKS!


I've seen a few versions on Pinterest from this Etsy Store...and I found plans here

The thing was pretty simple & straightforward to make, but you do need some "more than basic" tools to do it.  Luckily I know someone who has a huge workshop that's the envy of the neighborhood - thanks dad!  :)  Let's get to the pics...

That's my dad...he's always willing to help me out with my crazy projects...he's the best.


I can't wait to get home from work & jam.  ;)

Tuesday, October 30, 2012

Pinterest Challenge - Chalk Board Map!

Since Sherry & Katie started the Pinterest Challege over a year ago, I've been wanting to participate. I just didn't have the time...until now!  Ok, I lied, I still didn't have the "extra" time, but I made it happen because this project just had me so darn excited!


Anywhoo...a couple of months ago I pinned a picture of a chalkboard map from Terrain.  (I can't seem to find the map on their website anymore...it was there last week I swear!)  After hearing about the new edition of the Pinterest Challenge, I immediately googled "Chalkboard Map" & came up with a few other inspiration pieces.  (Links below.)


1. Chalkboard map at Terrain. (Can't find it?)  Update: found the link!
2. Vintage Rand McNally Chalkboard map.  Several results on google search.
3. Chalkboard map from Smile & Wave.
4. Military map from Restoration Hardware. (No longer available.)

Ok, so after I collected my inspiration pictures, I decided that I wanted a green "chalkboard" with the water painted a different color...most similar to the vintage Rand McNally map.  I started out by purchasing a yard & a half of heavy duty duckcloth (canvas) & a Sharpie paint marker at Joann, as well as green chalkboard paint from Menards.  I also sketched out a map in Illustrator, which I then converted to B&W & printed on a transparency.  Instead of trying to draw out the whole US freehand (nightmare), I can just shine the image onto the canvas using my overhead projector - easy peasy!

Here are a few of my illustrations...if you want to download a free .pdf of any of them, just click on the links below!  All I ask in return is that you go out & vote in November!  ;)


Links to the Green map, white map, black map.  My gift to you, fellow Americans!  :)

My little helper had fun coloring in all of the states.  He can now pick out Minnesota & California 90% of the time.  Hopefully his new map will help him learn the others!


After I determined the approximate size I wanted the map to be (it's big...52ish inches wide by 48ish inches tall), I cut it to size & hemmed up the two sides.  I left the top & bottom edges raw as I planned to staple them to wood dowels later.  No sense finishing them off only to have them get covered up!  I just folded each side twice so the hem was around an inch wide & sewed(?) two seams on each one, about 1/4" from each edge, if that makes sense at all. 


Grady stripped down to his skivvies & helped me prime this big sucker.  Isn't his shadow creepy with the giant furry head & tiny arm?!  It reminds me of a fetus with hair.  I'm weird, I know...I hear it every day!  :)


Next up, we took it into the kitchen to paint a couple of coats of green Rustoleum chalkboard paint.


The puckers in the fabric had me a little nervous, but things smoothed out (literally & figuratively) after we hung it on the wall to trace everything out!


After two coats of the green dried overnight, I taped the canvas back to the wall, lined up the projector where I wanted it, & traced out the map with my paint marker.  (At this point I didn't worry about getting the white perfect, I knew I'd be painting over some of it with the "water" color, & having to touch it up anyway, so I decided to wait & do the second coat/tracing all at once at the end.)


The paint marker dried really quickly, so I was able to crank out two coats of the "water" pretty much right away.  I kept going back & forth on what color to use, & ultimately decided on using some charcoal gray paint that I had on hand.  It ended up looking a little more brown than gray (lighting?), but I'm super happy with it!


After the two coats of charcoal, I traced over all of the white outline again to make it a little bit more opaque.  I also had my dad cut a couple of pieces of scrap wood to create a top & bottom to the map.  On the bottom section, I had him router out a ledge to store a few pieces of chalk - love it!  I stained the top & bottom supports with some leftover stain from the breakfast bar on the porch & stapled the canvas to the back of them.  Then I just attached some picture hangers & hung it on the wall!

Ta-da!  I wanted to take a photo of the whole dining room, but the sun was hardly up before I left for work this morning so I just didn't have enough light!  I'll try to update with a full room shot tomorrow!


I can't wait to plot out roadtrips, play "name-that-state" with Grady, & doodle national landmarks!  Plus, I finally have a giant piece of "art" to fill that empty space on the dining room wall!  Thank you Katie & Sherry for getting me motivated!!!

Update: I snuck home over lunch & conditioned the map by rubbing chalk all over it and wiping off.  She's ready to rock!


I'm liking it after rubbing the chalk all over it...it has a nice patina now!


And of course, the room shot I promised...

Blogging tips